

The other two projects in print making class did not bring me as much satisfaction as this one. I am a former farm wife, which can be a detriment in the process of creating something that needs fine tuning. I tend to work fast and hard to get the job done. Such as with picking fruit or a canning project. I think this could have come out better had I been more careful and thoughtful about the outcomes. If I had tweaked them, I might have had a whole set of really nice prints. But, all in all, I am the happiest with this project. I did get five final acceptable prints and three good artist proofs.
The process begins with a photograph which is scanned into the computer and printed out on regular paper. We took a piece of mat board and painted it with Wintergreen oil, and inverted the paper onto it. The winter green oil takes the ink off the paper and transfers it onto the mat board. We then took our razor knife and cut out the darker areas. We also built up lighter areas with paper cut to fit. I added sand to glue for the leaves. I used oregano for the foreground texture. I later used a puddy type product on the second run. The first set of prints had a sink hole form appear in the lake. I glued string for branches. After we finished adding the textures or subtracting paper layers we coated it with elmers glue mixed with medium and then sprayed it with a majic gloss finish.

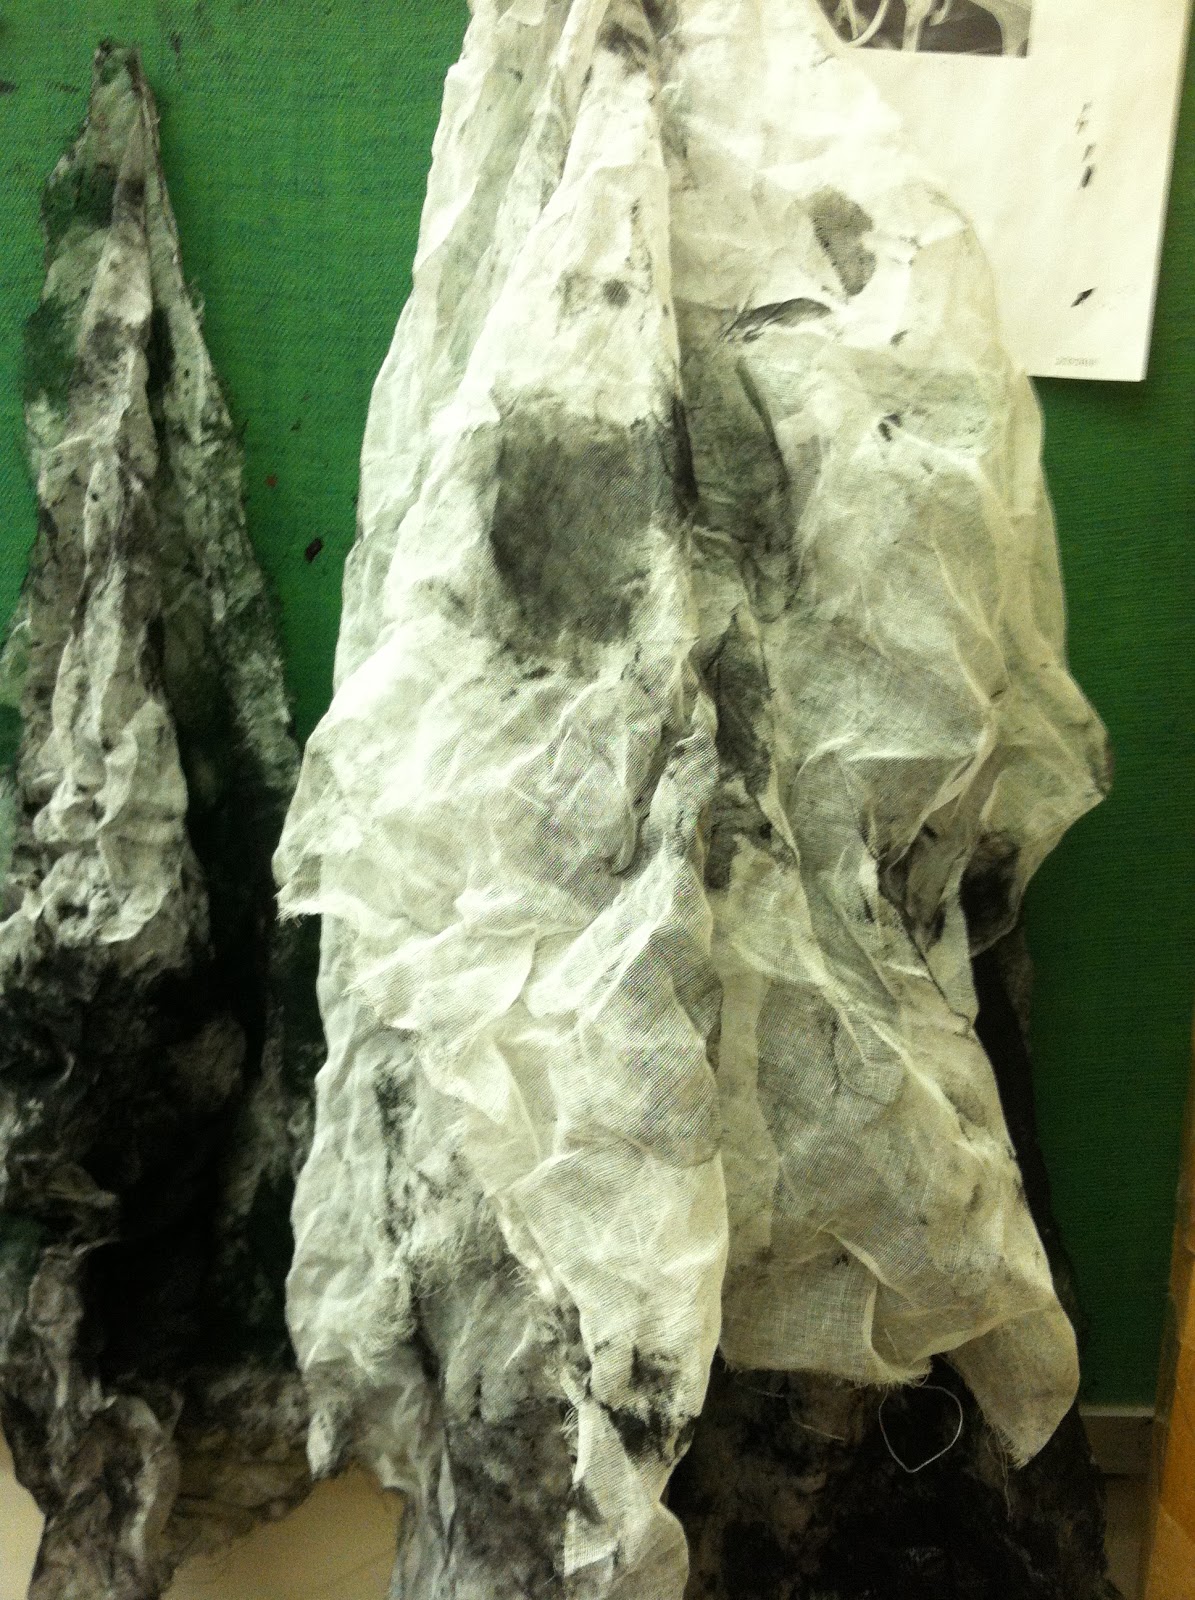
Calcium carbonate is added to the ink to make it thicker and stickier. The ink is mixed with the calcium and then applied to the plate. Next we wipe it off. Sadly, I have a photo of the tarlatan below. The tarlatans are stiff cheesecloth which are used to remove excess ink. Prior to printing after you have removed the right amount of ink, we were taught to do a "palm wipe" with the edge of our hand. This is to remove any lines that the tarlitan might have created. We used Reives bfk paper, which is not cheap! We needed five final prints. The paper is soaked and blotted. We created a newsprint template to set the plate on so that the print came out centered on the paper. We ran it through the press.

The plate became totally black, with applied ink. See the sink hole below(on a final print)?!


Minus the sink hole with texture added on the bottom. I think that I applied to much ink on the lower right corner. The above photo is not straight in front of the camera. The subject is Kershaw Park.
No comments:
Post a Comment
Note: Only a member of this blog may post a comment.